
Cauldron Cakes
/
This is part II of my mini-series on Harry Potter snacks from the books brought to life (part I is on Honeydukes treats, part III features every wizard's favorite drink—butterbeer!— and part IV showcases decadent butterbeer cupcakes).
When I was young, I wanted to grow up to be a writer. I also wanted to be a teacher, deep sea diver, and a cashier at McDonald's, but that's a different story. In early elementary school years, I would furiously write about anything and everything that came to mind. My stories expressed the affairs most important to a seven year old girl—monsters, dolls, and the first day of school. Though often incomprehensible, I was proud of my work. At the ripe age of eight, I took it upon myself to complete my first novel, Baby Gaga, which included 50 short chapters on the adventures of an articulate toddler learning to share, nap, and eat ice cream.
It would seem I had a bright future in writing, but all of this was cut short as soon as I entered fourth grade. Somewhere along the way, I just lost interest. Perhaps writing wasn't "popular." Perhaps I was too critical of my own work—nothing I wrote was good enough to satisfy me. At home, I would devour novel after novel, but I was no longer tempted to write my own.
For years, scarcely a sentence flowed from my pencil.
Then Harry Potter entered my life.
When I was fifteen years old, I became obsessed with the series. I would drink in as much of the magical world through the books and through the movies as I could. When that was no longer enough to satisfy my cravings, I began to seek out more. I discovered others who felt the same pull, the same desire to create more of this rich world. Together, we would write our own stories. I would borrow JK Rowling's characters and take them on my own adventures. I developed little known characters and gave them a story. A purpose. Writing became fun.
And the words began to flow from my pencil once more.
Harry Potter inspired me to continue writing again.
Since then, I've worked to keep writing a part of my life. Over time, my chosen topics have changed as my style has evolved. Gone are the days of writing about Harry Potter. Instead, I find myself journaling or finding small ways to share bits and pieces of my life with you.
While baking seems to come naturally for me, writing is still a challenge (and I imagine it will always be so). I often struggle with finding the right words to express the ideas swimming around my head. I am a slow writer, yes, but I have grown to love the art of the word. Sharing these words, thoughts, and ideas with you has become a natural part of my life. While writing can often feel like a chore, I find that the more I write, the more I am unable to imagine not writing. It has become a form of expression, a freedom, that is impossible to find anywhere else.
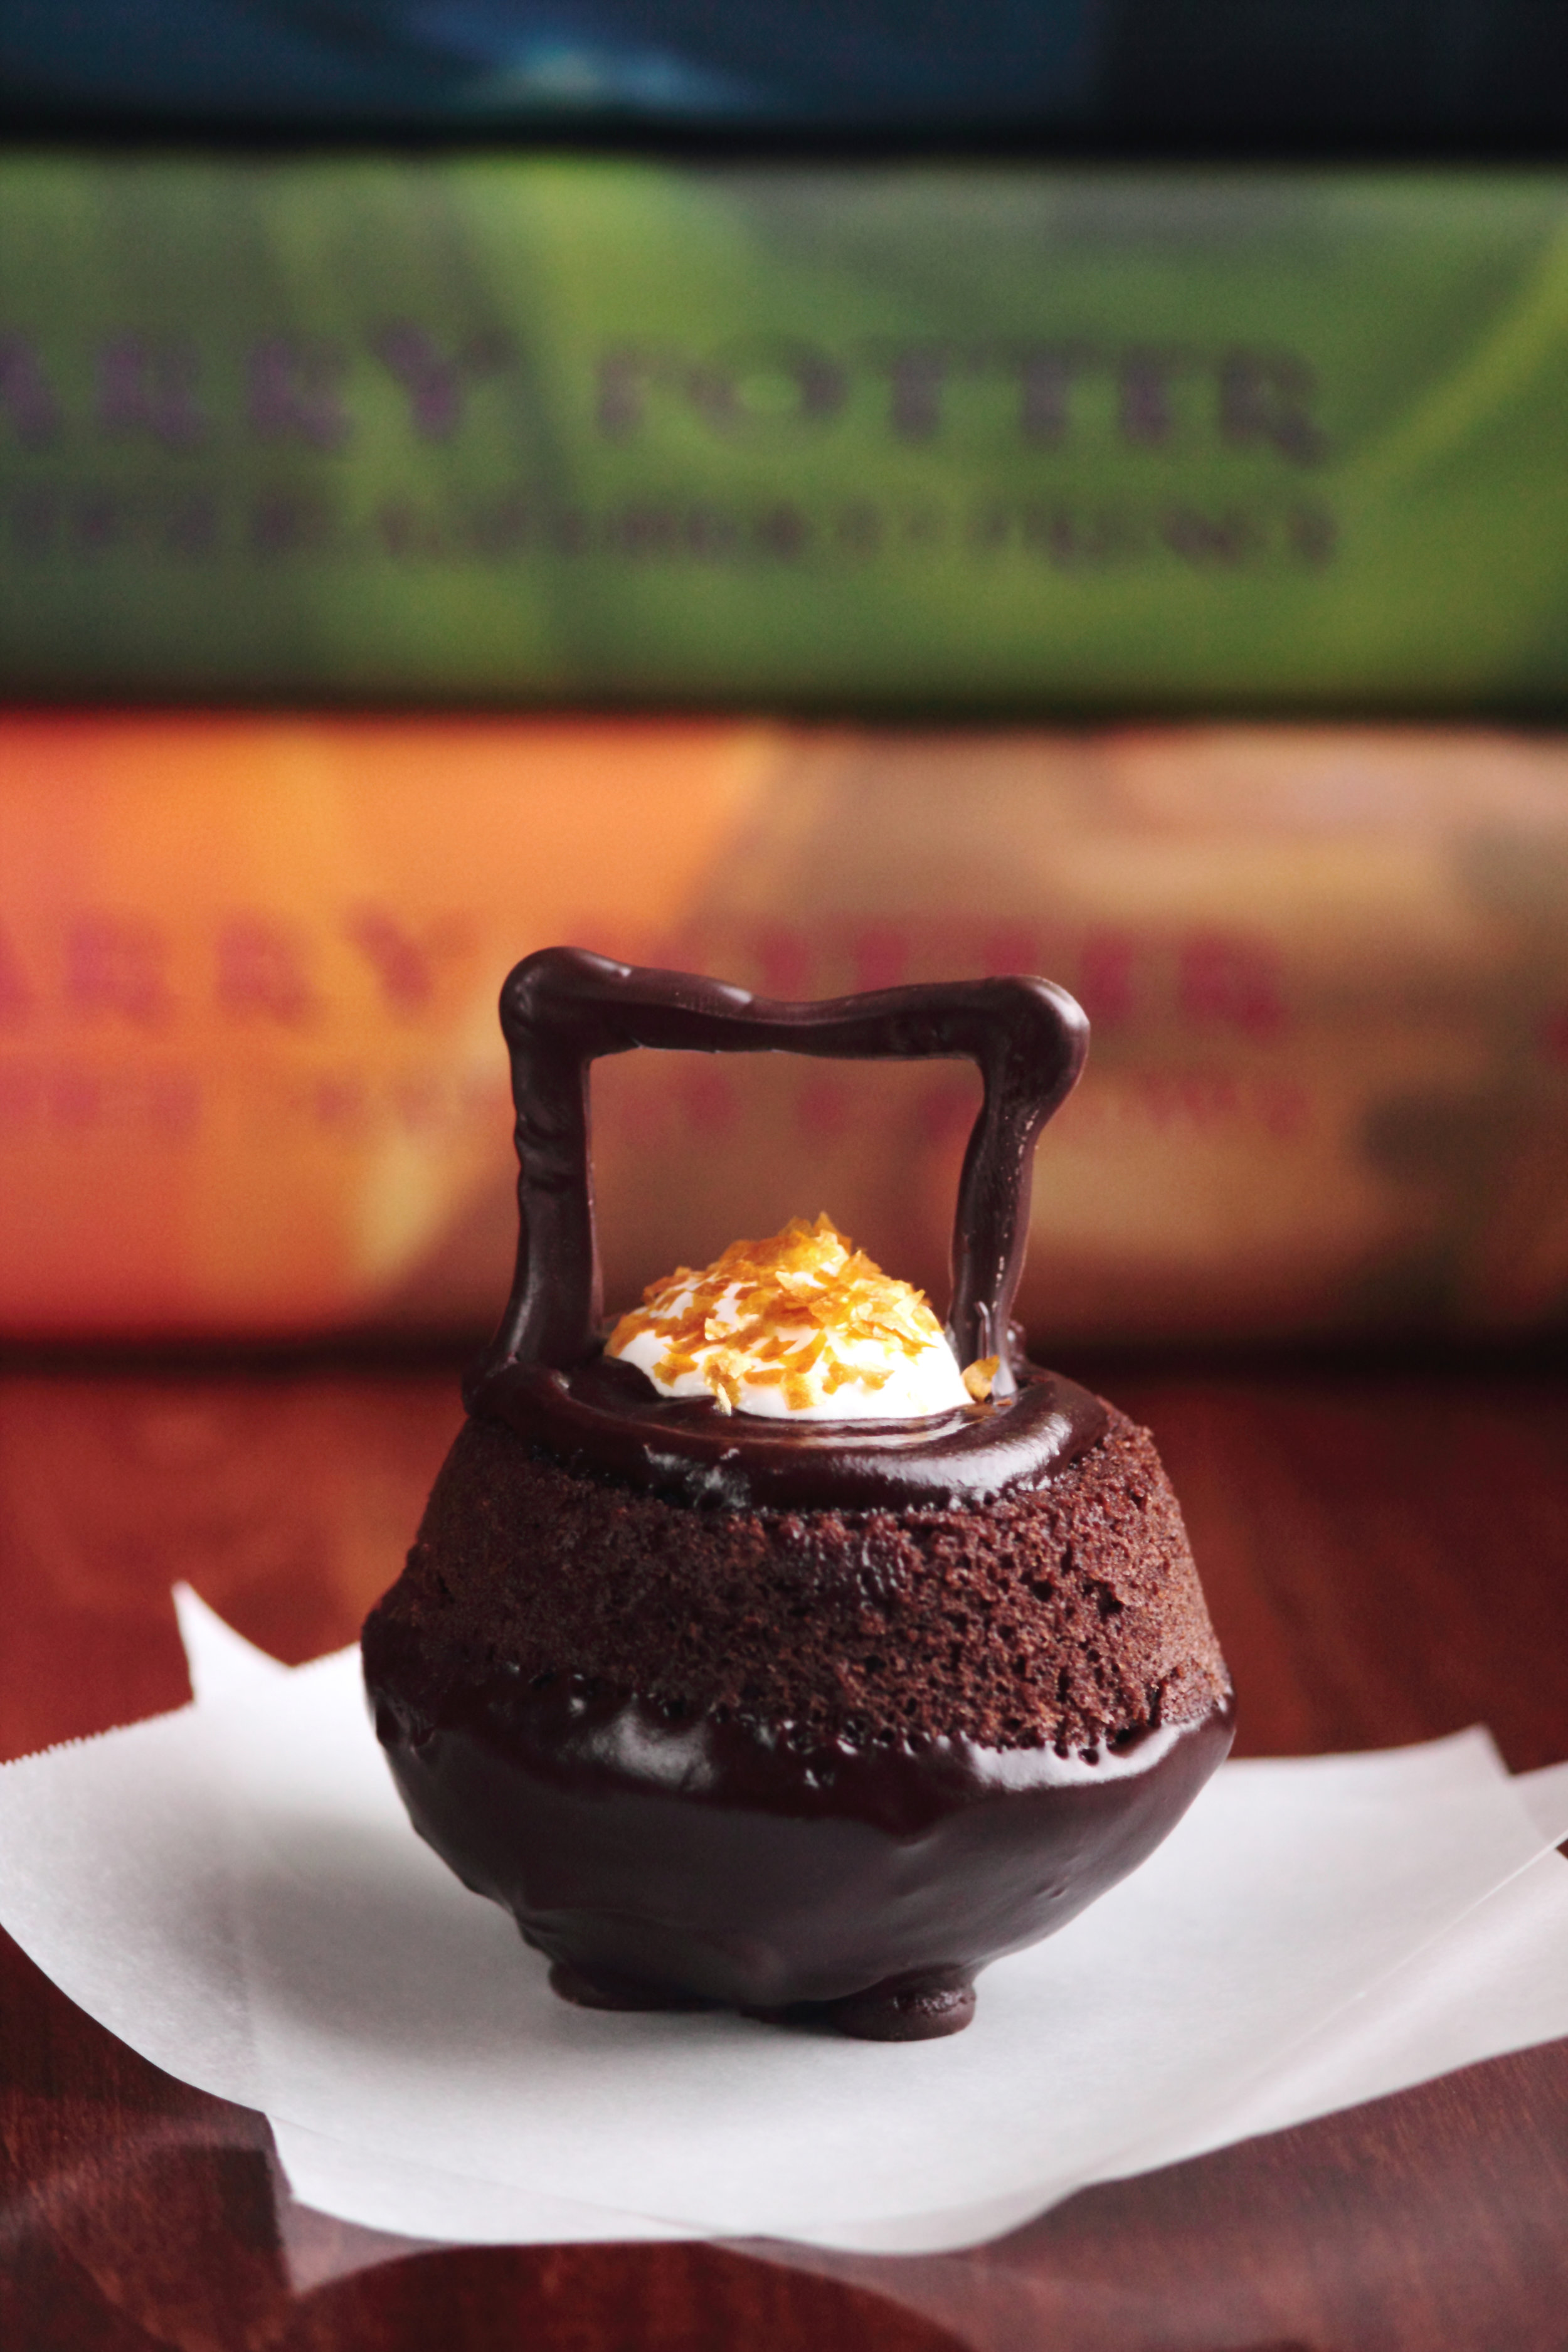
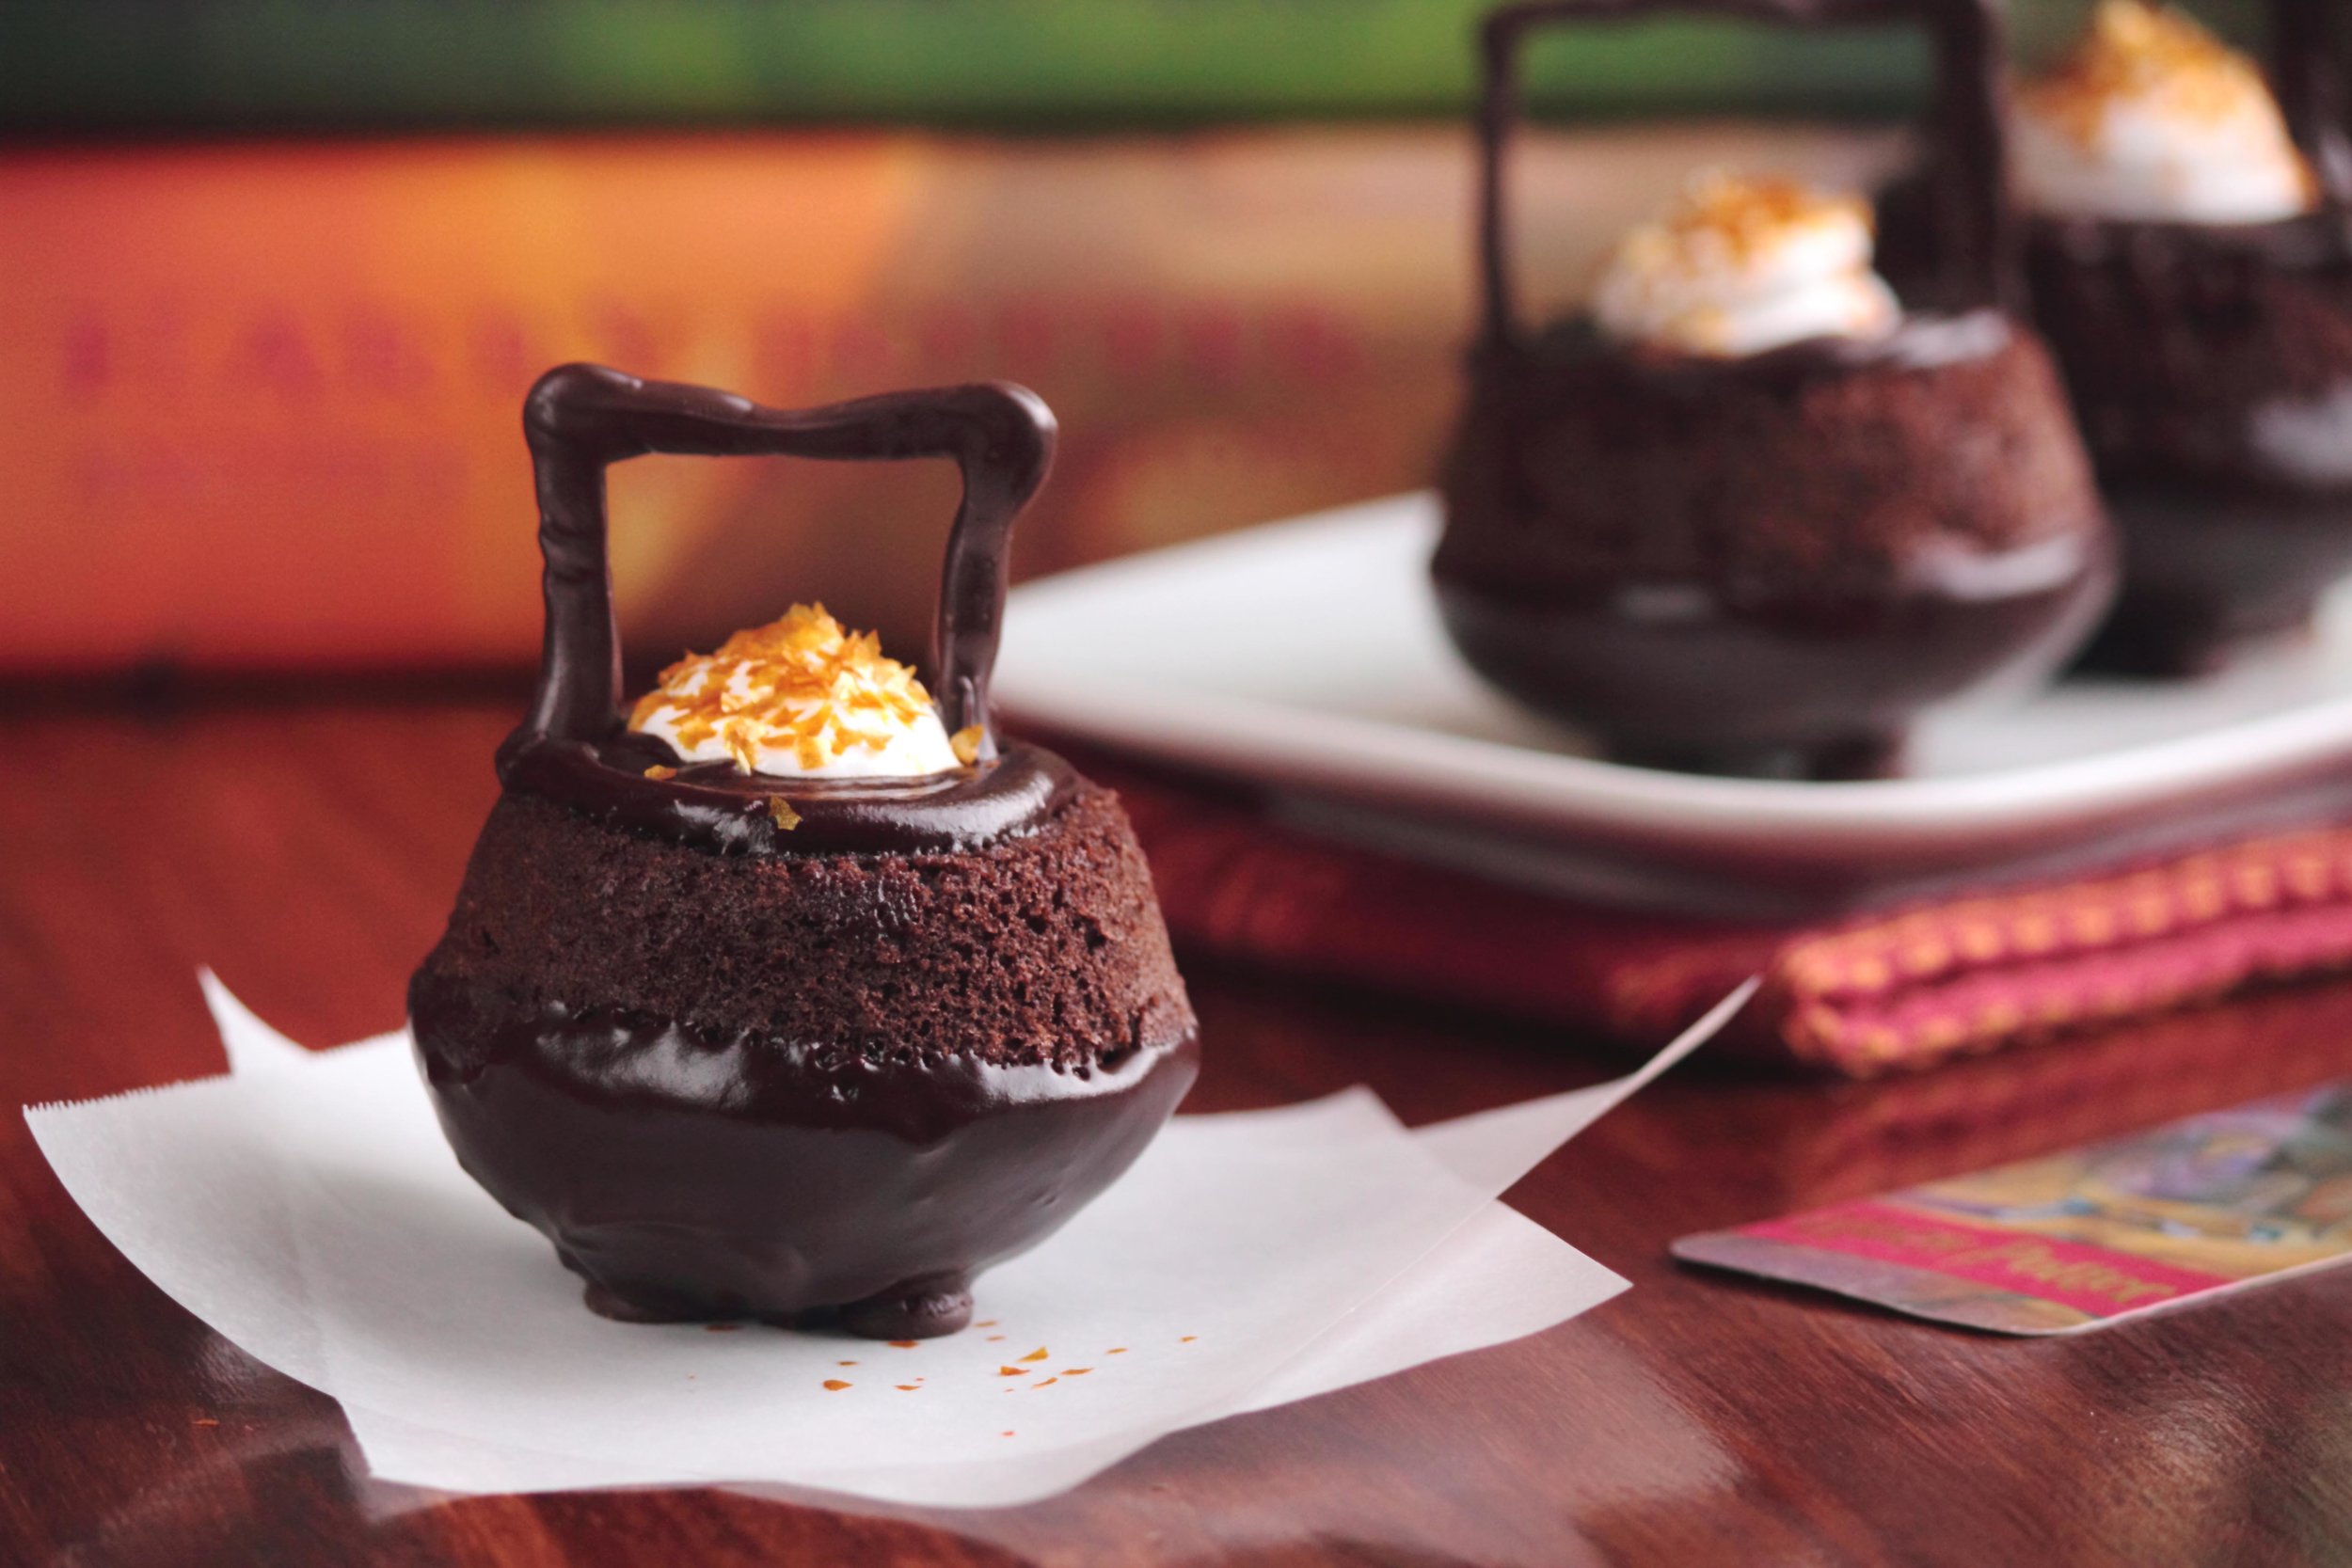
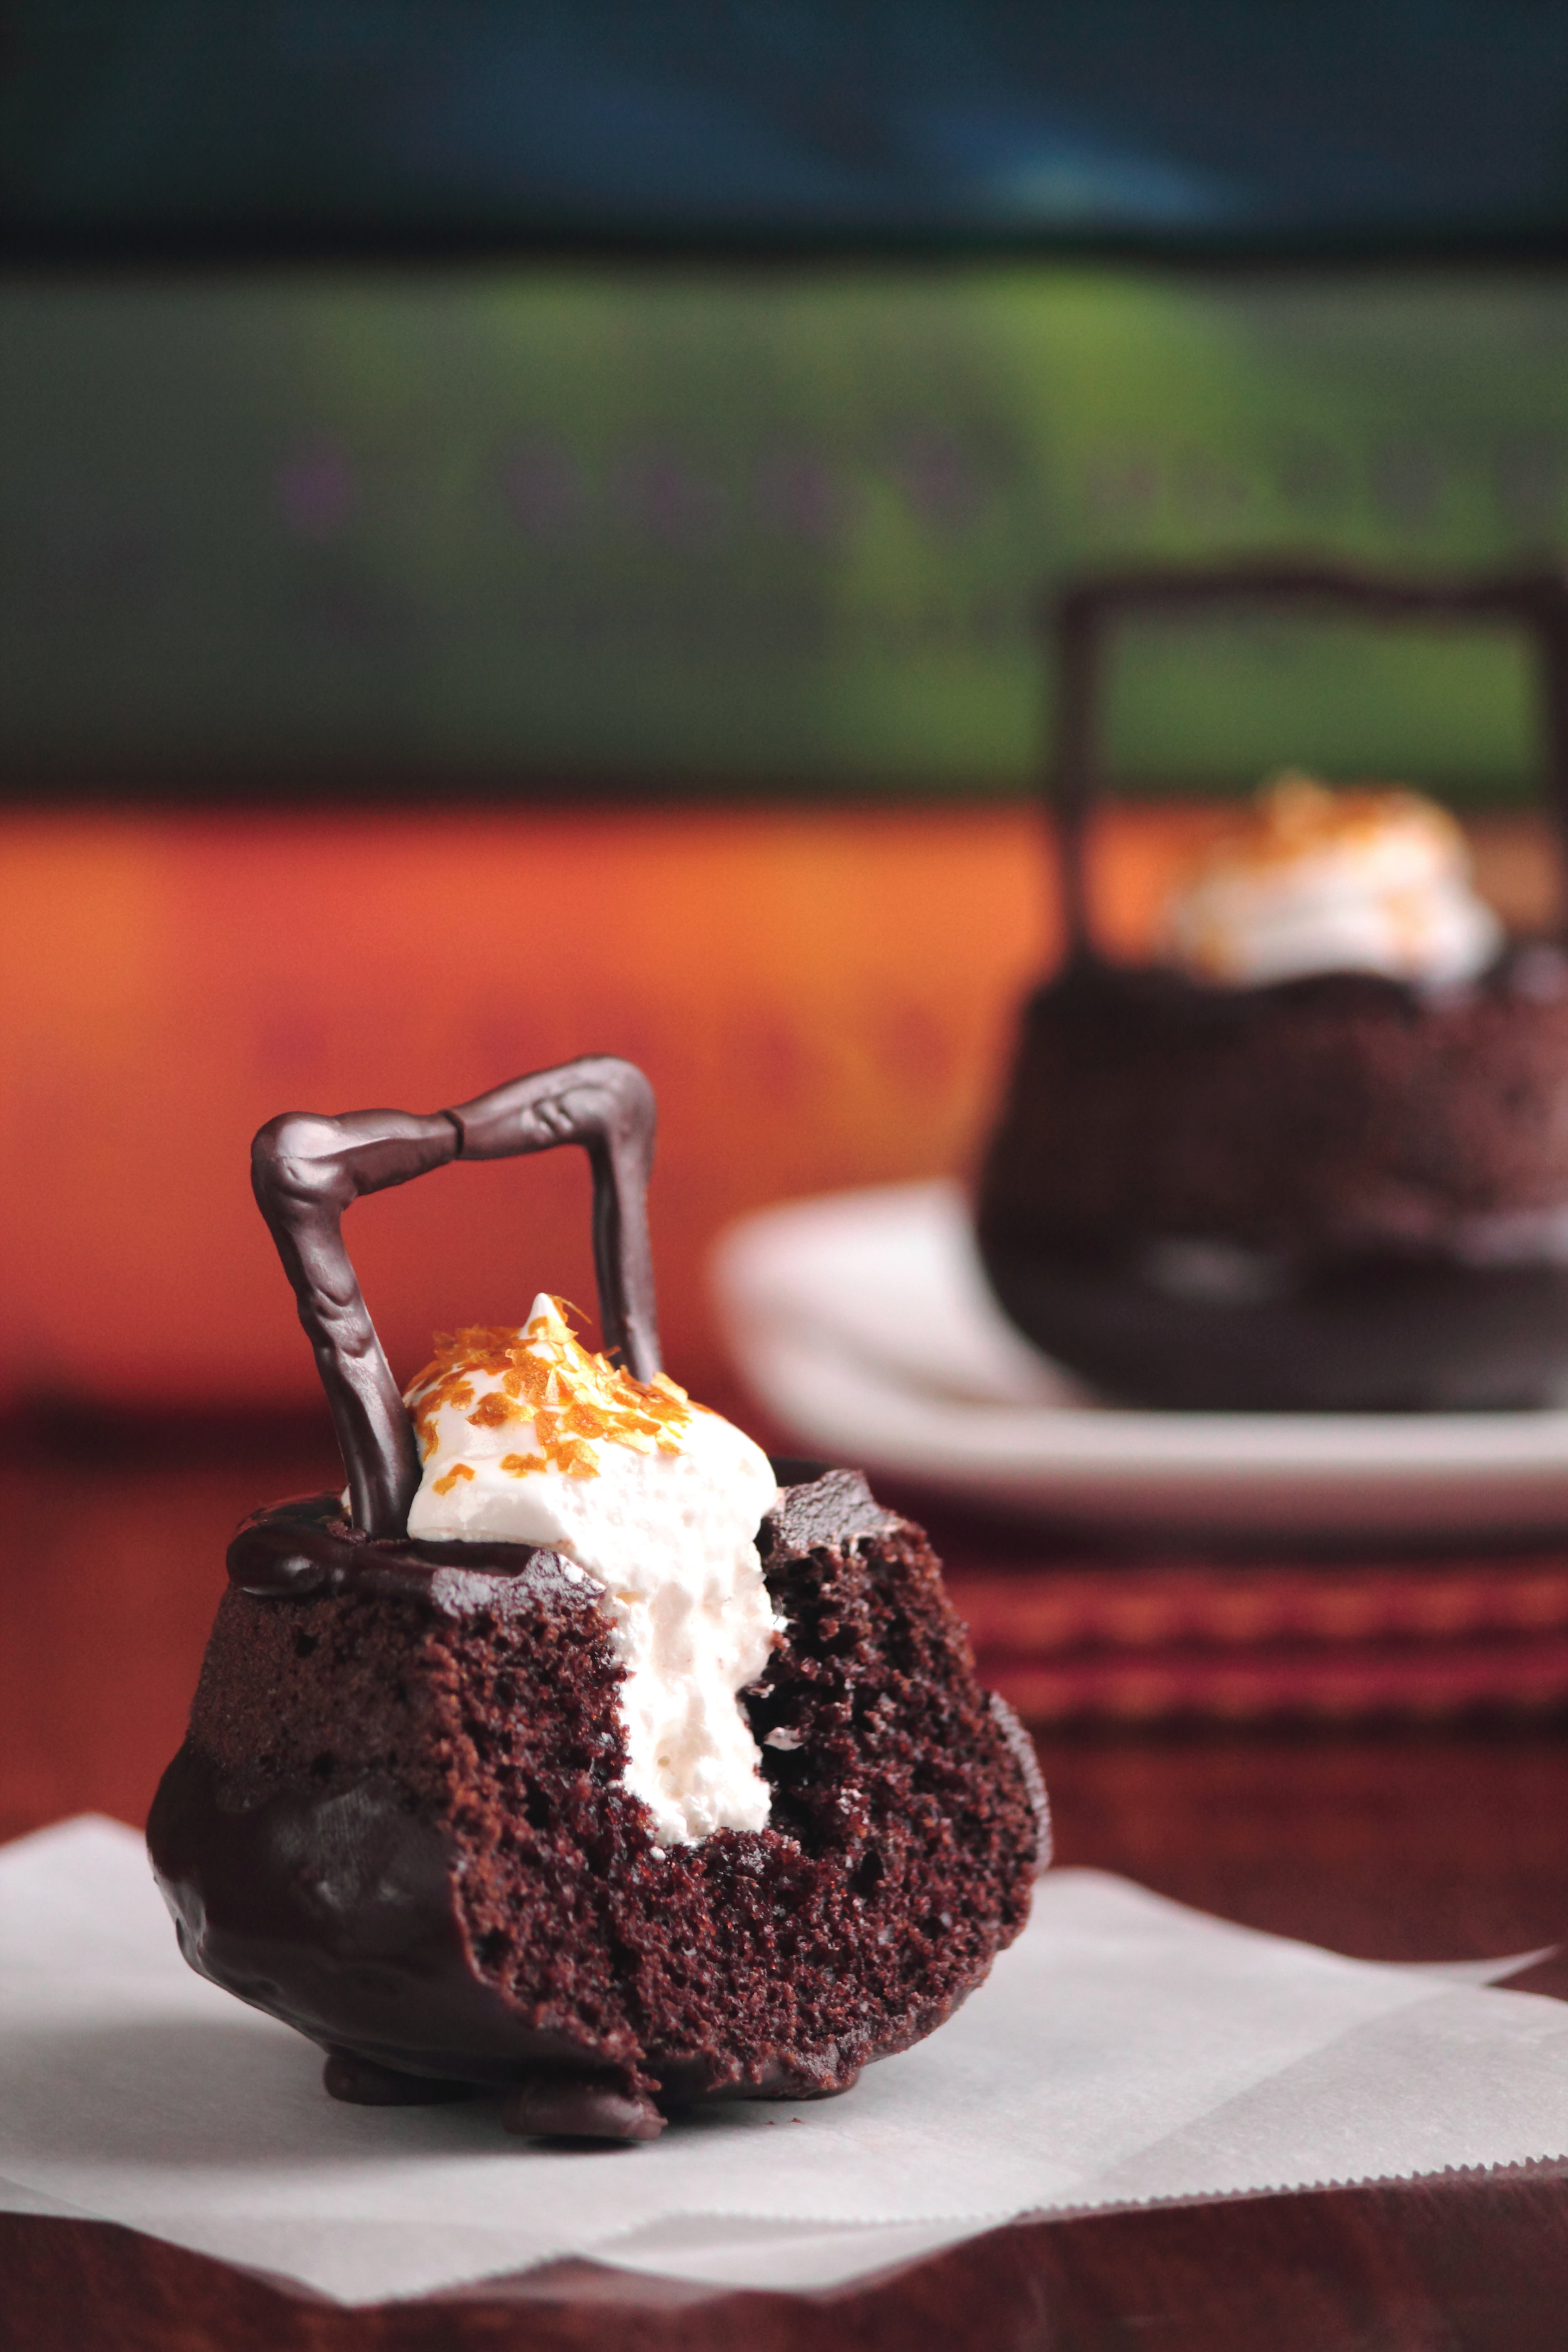
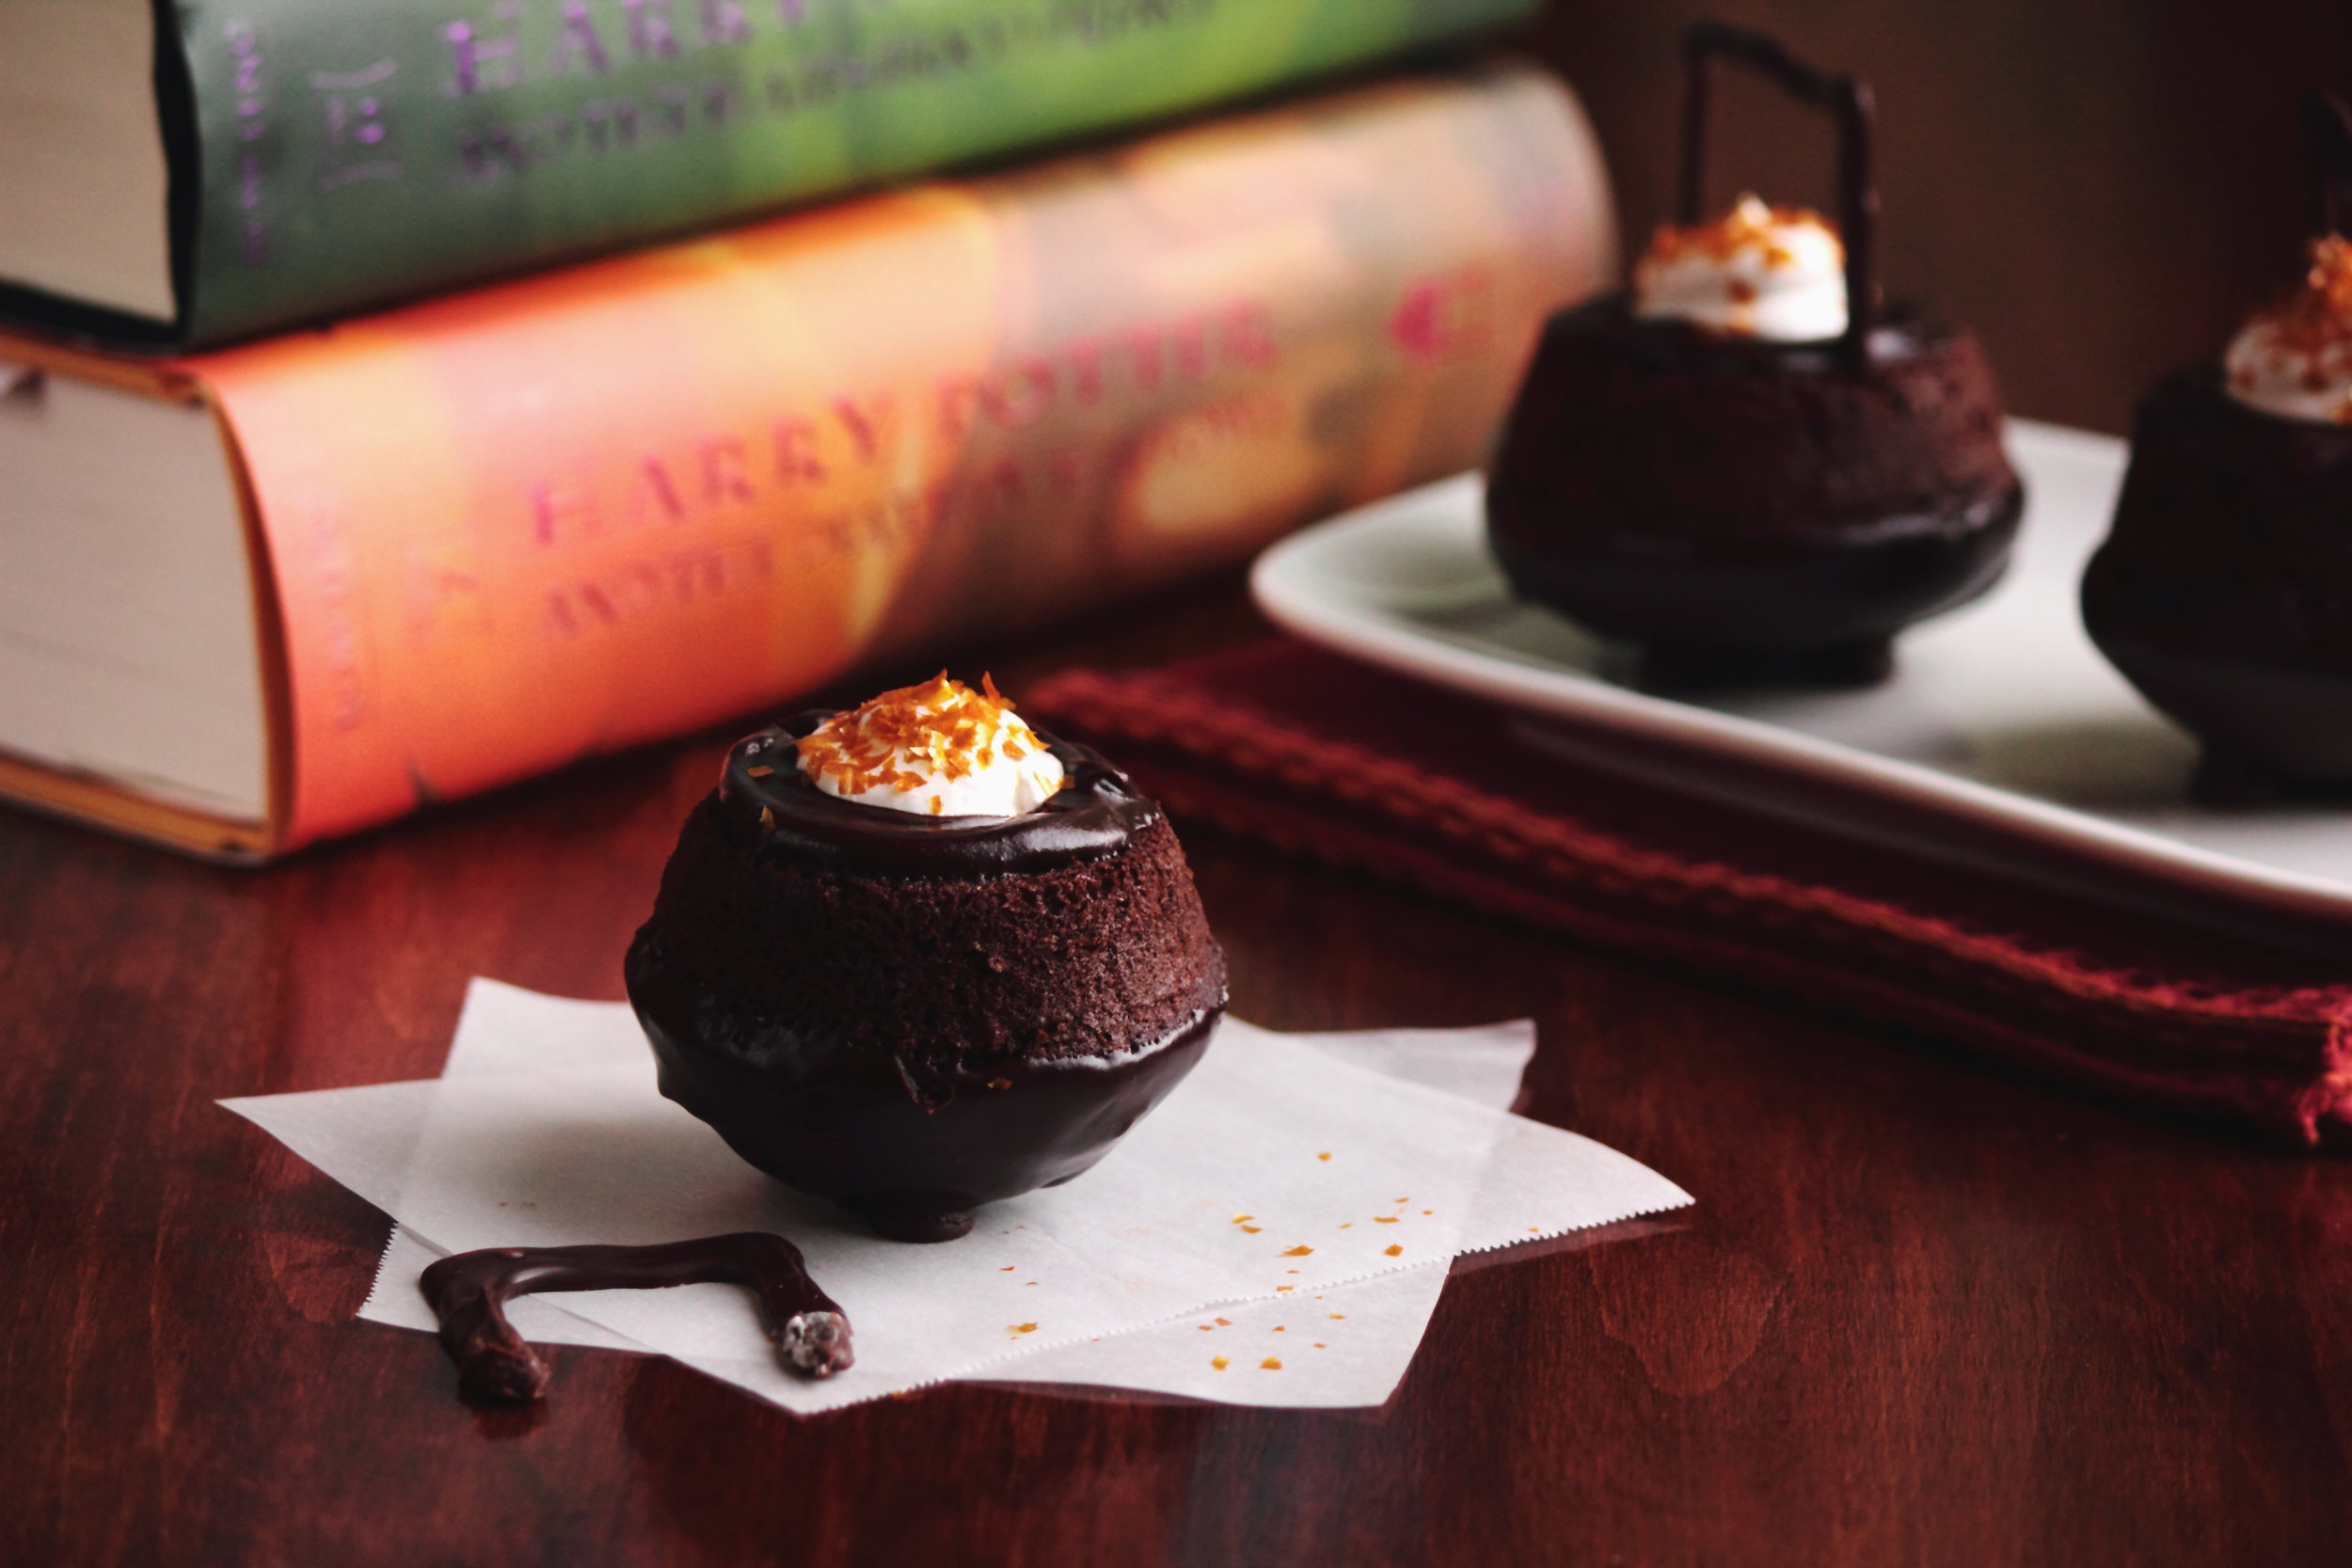
These Cauldron Cakes are the ultimate Harry Potter eye candy. They are easy to make, fun to eat, and, above all, delicious. Though the steps may appear long or complicated from a quick glance at the recipe below, I assure you they aren't. In less than an hour, you can have one of these cauldron cakes in your belly. By simply flipping a cupcake over, it opens a whole new world of possibilities. These cauldron cakes consist of devil's food cake cupcakes dipped into a rich chocolate glaze and filled to the brim with marshmallow filling. Chocolate chips form the cauldron feet, which not only keep these cauldrons looking more authentic, but stop the cauldrons from rolling around. I like to think the edible gold glitter means these cauldrons are filled with a little Felix Felicis (or "liquid luck").
These cupcakes would also make a perfect Halloween treat!
One Year Ago: Chocolate Chip Raisin Cookies
Cauldron Cakes
Inspired by Bakingdom
Yields 12 cauldrons
12 devil's food cupcakes
1 recipe for Chocolate Glaze (below)
1 recipe for Marshmallow Filling (below)
Approximately 1/2 cup chocolate chips
Edible gold glitter
Chocolate Glaze
6 ounces (1 cup) semi-sweet chocolate chips
4 tablespoons butter
In a double boiler, melt together the chocolate and butter, stirring until smooth. Glaze will be relatively thick. Remove from heat and let sit 5 minutes before use. If chocolate thickens too much, return to heat and stir until smooth and melted once more.
Marshmallow Filling
1 cup Marshmallow Fluff (or prepared marshmallow cream)
1/2 cup vegetable shortening
1/2 cup confectioners sugar
2 teaspoons vanilla extract
In a medium bowl, beat together the marshmallow fluff, shortening, sugar, and vanilla extract until light and fluffy, about 3-5 minutes.
To assemble
Using a cupcake corer or sharp knife, cut out a cavity in the bottom of the cupcake. When using a knife, I run it in a circular motion around the cupcake, while always pointing the knife towards the center (this will make the cavity cone shaped).
Dip the top of the cupcake into the chocolate glaze. Flip the cupcakes right side up and let rest until the chocolate sets, about 30 minutes. To speed up the process, place cupcakes in the refrigerator.
To make the cauldron feet, take 3 chocolate chips and form a small triangle, placing each chocolate chip roughly an inch from the others. Place the top of a cupcake onto the chocolate chips and push down ever so slightly so the chocolate chips will stick into the chocolate glaze. Repeat for the rest of the cupcakes.
Place remaining chocolate glaze into a piping bag and pipe a chocolate rim around the edge of the opening to the cauldron. If chocolate is too thick to pipe, heat chocolate glaze up until warm and allow to sit until glaze thickens slightly. If chocolate glaze is too runny to pipe, wait a few minutes until the glaze thickens to a pipe-able consistency. Alternatively, you could use a knife to spread the glaze around the edge of the cupcake.
Fill a pastry bag with marshmallow filling and pipe into the cavity of the cupcakes. Garnish the top with edible gold glitter.
To make cauldron handle, melt the remaining chocolate chips, stir until smooth, and place into a pastry bag. You don't need a special tip for this step; I simply cut off the very end of the pastry bag which was sufficient. On a non-stick mat or wax paper, pipe out the handles (feel free to use any pattern you'd like). I recommend measuring the cupcakes with a ruler to determine how wide you need to make the handles before piping. Let the chocolate set until hardened, approximately 30 minutes, before very carefully peeling off of the non-stick surface and placing into the top of each cupcake.
And you're done! Eat and enjoy.


